开始前你需要開始前你需要Before you start
- 一个存在 / 动作传感器,已经加进 Apple「家庭」App(领普 ES5、Aqara FP 系列等)一個存在 / 動作傳感器,已經加入 Apple「家庭」App(領普 ES5、Aqara FP 系列等)A presence / motion sensor already added to the Apple Home app (Linptech ES5, Aqara FP series, etc.)
- 一个已经建好的 ZoneFoundry 场景(见上一篇教程)一個已經建好的 ZoneFoundry 場景(見上一篇教程)A ZoneFoundry scene you've already created (see the previous guide)
为什么用毫米波(mmWave)传感器?普通红外(PIR)传感器只感「动作」—— 你坐定不动它就以为没人,音乐会断。毫米波传感器(如领普 ES5)能感「存在」,坐着、躺着不动都侦测得到,最适合做这种自动场景。為什麼用毫米波(mmWave)傳感器?普通紅外(PIR)傳感器只感「動作」—— 你坐定不動它就以為沒人,音樂會斷。毫米波傳感器(如領普 ES5)能感「存在」,坐著、躺著不動都偵測得到,最適合做這種自動場景。Why a mmWave sensor? A plain infrared (PIR) sensor only detects motion — sit still and it thinks the room is empty, so the music cuts out. A mmWave sensor (like the Linptech ES5) detects presence: it still sees you when you're sitting or lying still — ideal for this kind of automation.
步骤步驟Steps
新建自动化,选你的传感器新建自動化,選你的傳感器New automation, pick your sensor
打开 Apple「家庭」App →「自动化」→「添加自动化」→ 选「感应器检测到变化」→ 拣你的存在传感器(例如客厅的领普 ES5)。打開 Apple「家庭」App →「自動化」→「加入自動化」→ 選「感應器偵測到變化」→ 揀你的存在傳感器(例如客廳的領普 ES5)。Open Apple Home → Automation → Add Automation → choose "A Sensor Detects Something" → pick your presence sensor (e.g. the living-room Linptech ES5).
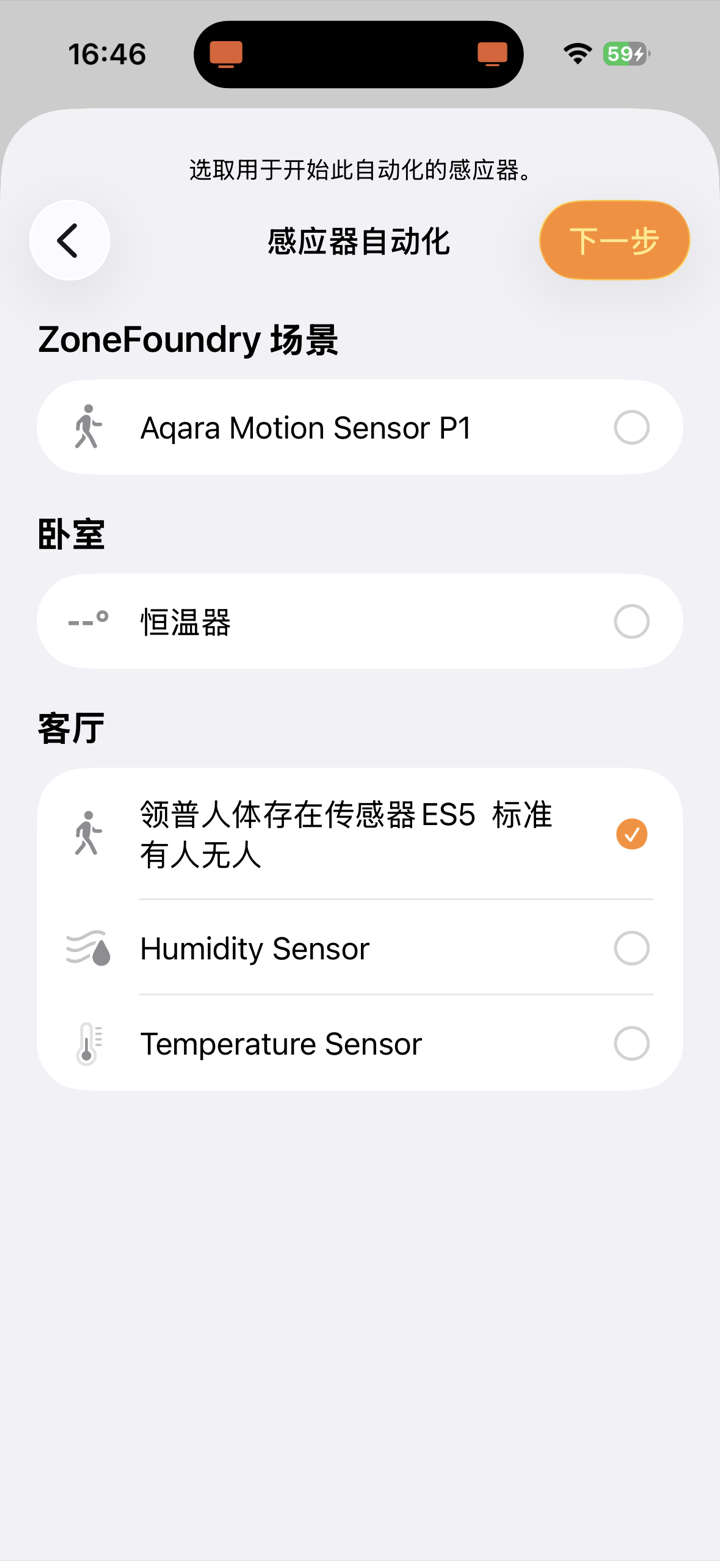
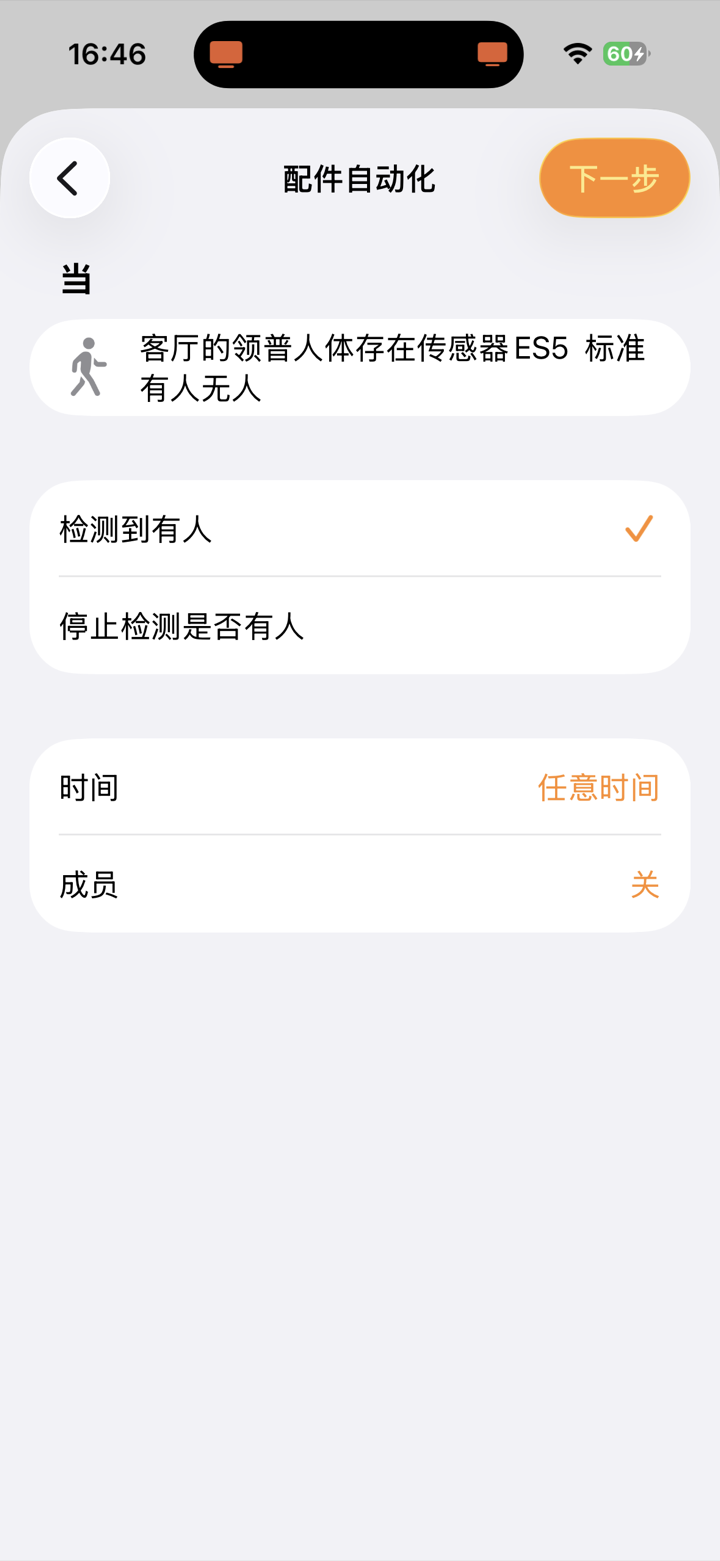
设触发条件「检测到有人」設觸發條件「偵測到有人」Set the trigger to "detects presence"
选「检测到有人」。可以再设时间段、成员等条件(例如只在傍晚触发)。選「偵測到有人」。可以再設時間段、成員等條件(例如只在傍晚觸發)。Choose "Detects presence". You can also add conditions like time of day or who's home (e.g. only in the evening).
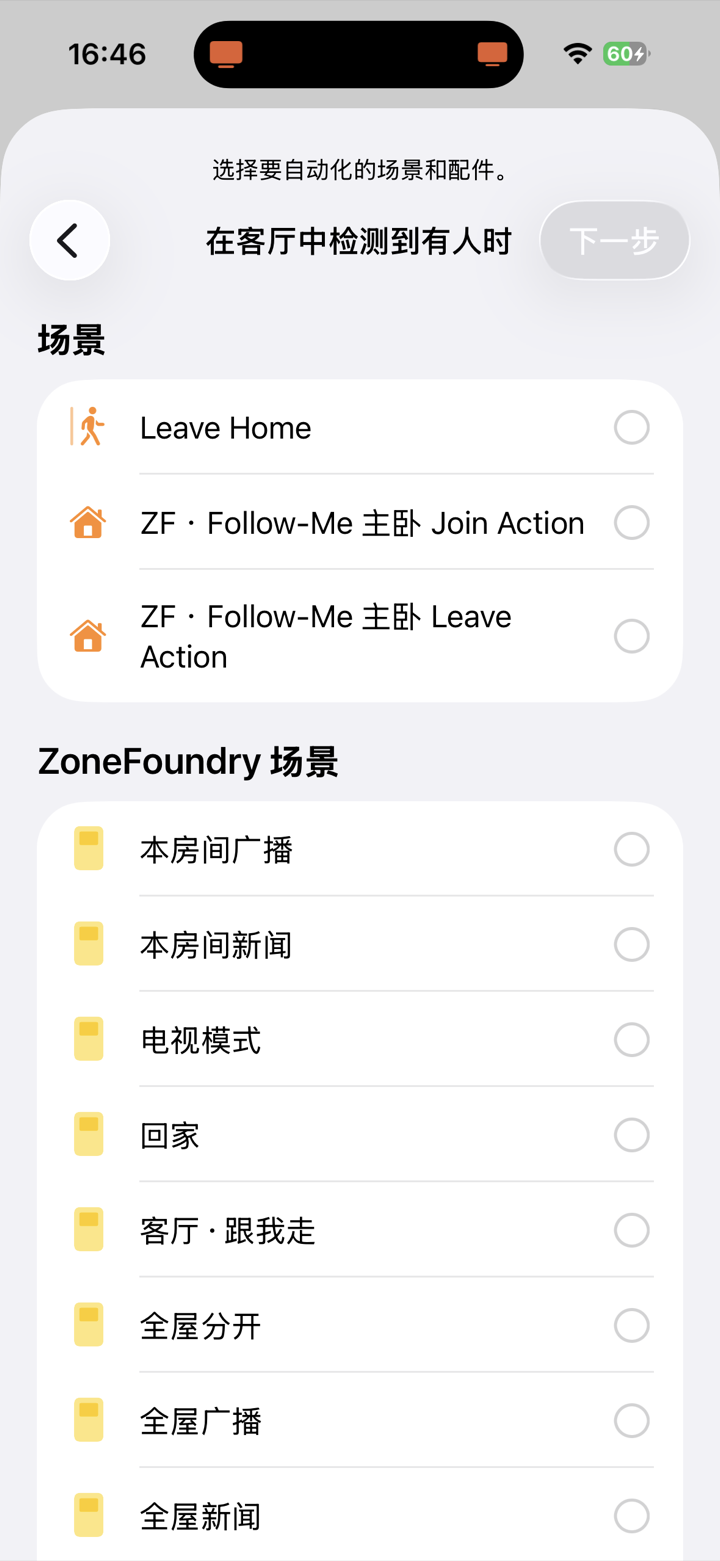
选要运行的 ZoneFoundry 场景選要運行的 ZoneFoundry 場景Pick the ZoneFoundry scene to run
在场景和配件列表里,拣你的 ZoneFoundry 场景(例如「回家」)。想连埋灯、空调,就一齐勾上 —— 跟前一篇教程一样。在場景和配件列表裡,揀你的 ZoneFoundry 場景(例如「回家」)。想連埋燈、空調,就一齊勾上 —— 跟前一篇教程一樣。From the scenes and accessories list, pick your ZoneFoundry scene (e.g. "Arrive home"). Want lights and AC too? Tick them as well — just like the previous guide.
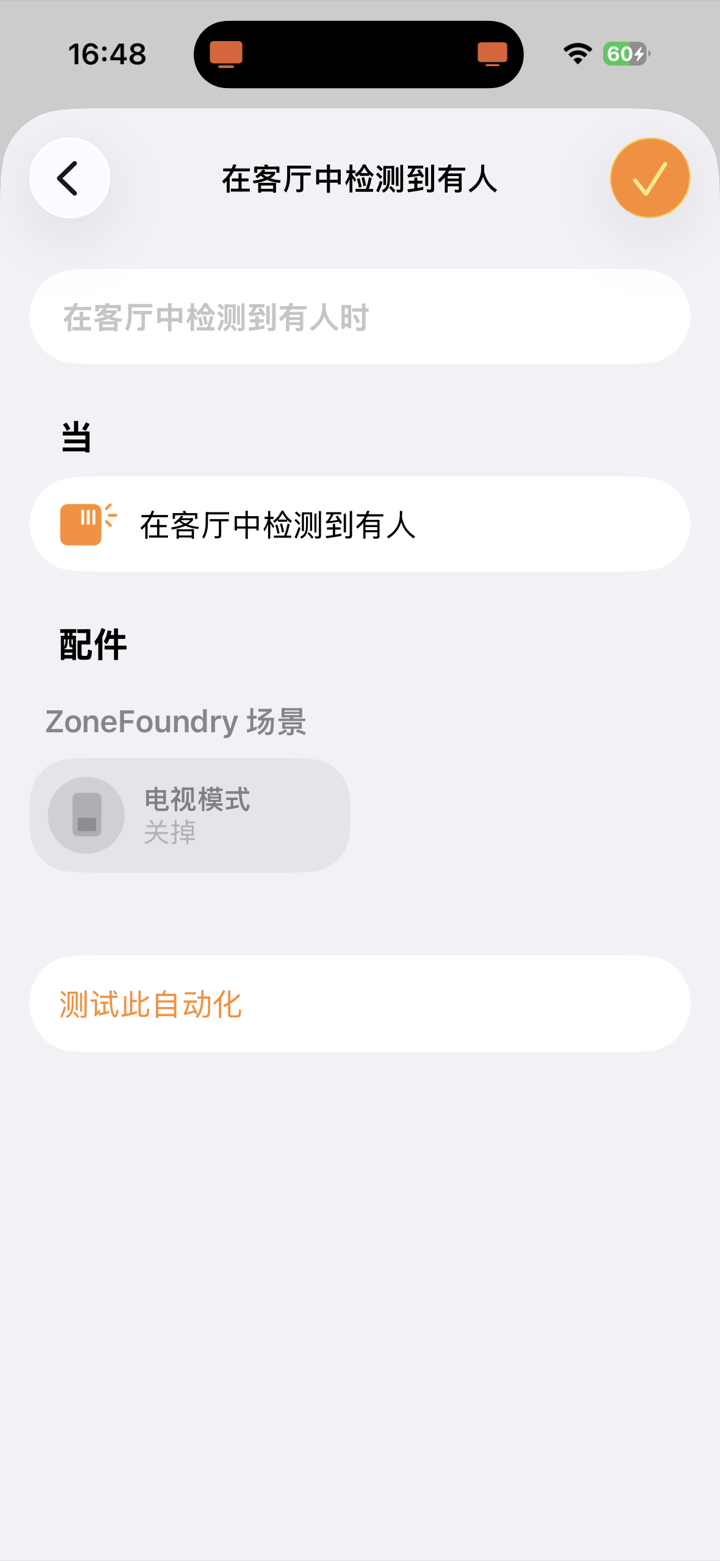
完成,并测试一下完成,並測試一下Finish, then test it
点「完成」。可以点「测试此自动化」即时验证。之后人一行入房间,场景就自动开 —— iPhone 锁屏都照跑。點「完成」。可以點「測試此自動化」即時驗證。之後人一行入房間,場景就自動開 —— iPhone 鎖屏都照跑。Tap "Done". You can hit "Test This Automation" to check it right away. From now on, walking into the room runs the scene by itself — even with your iPhone locked.
想人走了自动停?再建一条自动化:同一个传感器,触发条件改成「停止检测到有人」→ 运行一个「停止」或「全屋暂停」场景。一来一回,人来人走全自动。想人走了自動停?再建一條自動化:同一個傳感器,觸發條件改成「停止偵測到有人」→ 運行一個「停止」或「全屋暫停」場景。一來一回,人來人走全自動。Want it to stop when you leave? Add a second automation: same sensor, trigger set to "Stops detecting presence" → run a "Stop" or "Pause everywhere" scene. Now it follows you both ways, fully automatic.